Time needed: 4 minutes.
This step-by-step guide teaches you how to send photos to a digital frame from iPhone. We’re going to focus on the Pix-Star digital picture frame, but this general process can be used across most digital photo frames that have an iOS compatible mobile app and Wi-Fi capabilities. In Pix-Star’s case, the iPhone sends the pictures to the frame’s unique email address, which in turn is saved to the Pix-Star frame’s internal storage. Let’s get into the steps below!
- Download the Pix-Star Snap Mobile App

The Pix-Star Snap mobile app is Pix-Star’s dedicated app that’s used to send pictures, videos, and audio messages directly to your frame. It’s unique in the sense that you can send up to 250 images to multiple frames at the same time. You can also send videos and audio notes without needing to pay for any recurring subscription fees (as with Nixplay and Skylight).
The Pix-Star Snap mobile app is compatible with both iOS and Android. You can use it on phones and tablets without issue. Search for “Pix-Star Snap” in either the Play Store or the App Store and download & install it. When you first open the app and try to use any of the functions, you may be prompted to grant permission that lets the app access the gallery, camera, etc.
Note that the iOS version of the Pix-Star Snap mobile app has a slightly different layout to the Android version. You’ll need to add your Pix-Star to the first screen (the app’s home screen). The Android version only requires you to add the receiving frames after selecting the media you want to send.
Pix-Star’s app will remember all added frames and they simply need to be selected from the list of added frames. You don’t need to re-add the frame every time you send pictures.
To add your Pix-Star frame to the iOS app, click on the “+” symbol at the top right of the app’s opening screen. Put in your frame’s unique email address and nickname then click “Add”. Click on the frame’s name from the list and move onto the next step. - Capture New Pictures Directly Inside the App

After adding your frame to the app and selecting it from the list, select the “Take a picture and send it” option. This opens your phone’s camera inside the app. You may need to grant the app permission to access your camera. It’s necessary if you want to capture new photos directly inside the app.
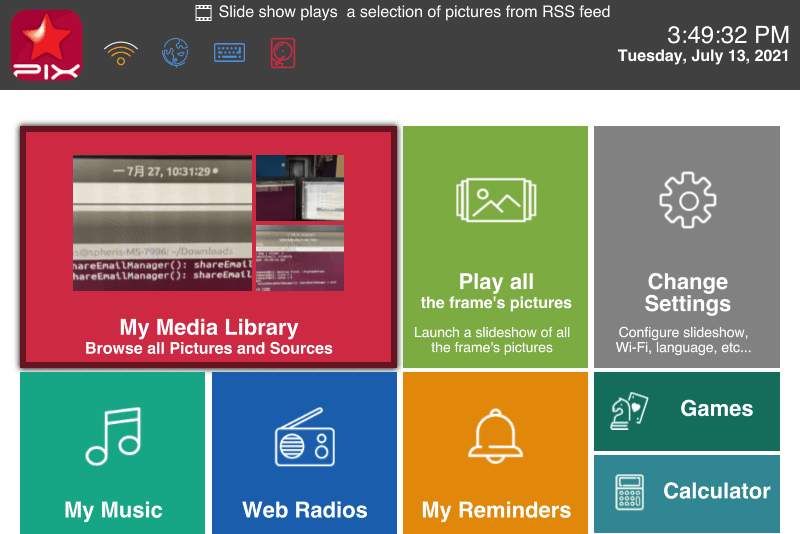
Simply capture the photos and hit “send”. The photo will shortly appear on your frame. You can even set new photos to show up as they are received. These received pictures are saved to the frame’s internal storage which is accessed through the “My Media Library” tab from the home screen on the frame. - Select Pictures from Your iPhone’s Gallery

This method lets you select all the pictures you want to send directly from your phone’s gallery. It’s a great option for sending the photos you took on your latest trip when you get back home. You can send up to 250 photos at once.
Select the receiving frame from the list of added Pix-Star frames. Click on the “Select and send pictures” option from the list. Here you can browse through all of your iPhone’s photos and folders. Press and hold on to an image to activate the multi-select function. Now you can choose all the photos you want to send to the receiving frame.
If you only want to send one photo, simply click on it (without the press & hold). Photos with a checkmark on their thumbnail have previously been sent to the selected frame and don’t need to be re-sent. Once you’ve chosen all the photos you want to send, hit the “Send” icon. You can review all the photos you want to send before the final sending.
Note that it can take a few minutes for the photos to fully send, receive, and save on your Pix-Star depending on the size and number of photos. All received photos are saved to the Pix-Star frame’s internal storage and can be accessed while offline. New photos can also be set to automatically display on the frame’s screen as they are received, making sure you never miss an important photo or moment. - View the Pictures in a Slideshow on Your Pix-Star Frame

To view slideshows of all of your recently received photos from the Pix-Star Snap mobile app, click on the “My Media Library – Browse all Pictures and Sources” option from the frame’s main menu. This takes to the file explorer/media gallery containing all photos and other media on your Pix-Star frame.
Select the “Photo-Mails” tab from the horizontal panel and click “ok”. This will show you all the folders that contain photos received via the frame’s dedicated email address. This includes photos send as attachments in emails and media sent to the frame via the mobile app.
You can browse through entire folders and files and manually select the photos you want to include in a slideshow. It’s a great way to customize which folders and photos are included in a slideshow. If you want to start a slideshow from a specific folder only, click on the “Select files/folders” option from the left-side panel. Now you can choose the folder(s) you want to play a slideshow from. Click on “Play slideshow of the selection” to start the slideshow containing only the chosen files/folders.
You can select multiple folders to play customized slideshows from. Inside each folder, you can also select multiple files to play a slideshow, while ignoring unselected files in the same folder. Note that this can also be done remotely through the web interface dashboard.


